In the first days of your baby’s life, you might be surprised by two things: how impossibly small they are, and how surprisingly sharp their fingernails can be. Those delicate, paper-thin nails grow at an astonishing rate and can quickly become tiny razors, leaving scratches on their own face, your skin, and even causing corneal abrasions if they get near their eyes. For many new parents, the thought of bringing a sharp tool near their newborn’s tiny fingers and toes is a source of genuine anxiety.
But baby nail care is a non-negotiable part of hygiene and safety, not a vanity project. It’s a skill that balances precision with confidence to prevent injury—both from the nails themselves and from the trimming process. This guide is designed to transform that anxiety into competence. We will cover everything from the best tools for cutting baby nails and step-by-step trimming techniques to understanding common issues like ingrown toenails. Grounded in practical advice that aligns with recommendations from the American Academy of Pediatrics (AAP) and pediatric dermatology, our goal is to provide you with a clear, calm, and comprehensive approach to keeping those tiny digits safe and healthy.
Chapter 1: Understanding Baby Nails – The Biology of Those Tiny Tips
A baby’s nails are fundamentally different from adult nails. Understanding their structure is the first step to caring for them properly.
- Softer and More Pliable: Newborn nails are very soft and often curl at the edges. They are more like thick extensions of the skin than the hard keratin plates adults have. This is why they can sometimes be gently peeled or filed in the early weeks.
- Fast Growth: Fingernails grow remarkably quickly and may need trimming as often as 1-2 times per week. Toenails grow slower and may only need attention every 2-3 weeks.
- Adhered to the Skin: The nail bed is tightly connected to the underlying skin, making the classic “white tip” that guides adult trimming virtually non-existent in newborns. This is the primary source of parent anxiety—the fear of cutting the skin.
This unique biology dictates the tools and techniques you’ll use, prioritizing safety and gentleness above all.
Chapter 2: Assembling Your Toolkit – Choosing the Right Tools for the Job
Having the right tool removes half the fear. Each has its ideal use case.
1. The Gold Standard: Baby Nail Clippers
- Features: Look for clippers with rounded safety tips, a magnifying glass, and a comfortable grip. They are designed for precision.
- Best For: Most parents find these easiest for fingernails once the baby is a few weeks old and the nails have firmed up slightly.
- Safety Tip: Ensure they are sharp. A dull clipper can crush or tear the nail rather than cutting it cleanly.
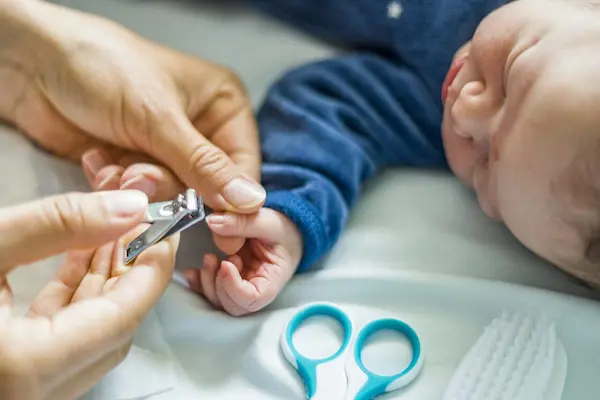
2. The Beginner’s Favorite: Baby Nail Scissors
- Features: These have small, blunt-tipped blades that are slightly curved.
- Best For: Many parents prefer scissors for newborns because they offer more control over each small snip. The blunt tips prevent stabbing if the baby moves suddenly.
3. The Gentle Alternative: Electric Baby Nail File
- Features: A battery-operated file with a soft, spinning砂纸头 (sandpaper head) that gently grinds the nail down.
- Best For: Extremely anxious parents, babies who are very squirmy, or for simply smoothing rough edges after a clip. It’s virtually impossible to cut the skin. The noise can startle some babies.
- Note: Choose a model designed for infants with a very fine-grit head.
4. The Classic: Emery Board or Soft Nail File
- Best For: Newborns in the first week or two when nails are softest, and for daily maintenance to simply file down any sharp corners between trims. Always use a fine-grit file and file in one direction.
Chapter 3: The Step-by-Step Guide to a Stress-Free Trim
The key to success is preparation and technique, not speed.
The Ideal Setting & Timing:
- When They’re Asleep: This is the gold-standard method for many. During deep sleep (often after a feed), their hands are relaxed and still.
- With a Helper: Have one person hold/comfort the baby while the other trims.
- After a Bath: Nails are softer and easier to cut.
- In Good Light: Natural daylight by a window is perfect.
The Fingernail Technique (Using Clippers or Scissors):
- Positioning: Hold your baby’s palm and finger firmly but gently. Press the finger pad slightly down and away from the nail to create space.
- The “Flat Across” Rule: For fingernails, aim to trim the nail straight across, following the natural curve of the finger tip. Avoid rounding the corners deeply, as this can encourage ingrown nails.
- Small Snips: Take tiny, incremental cuts. Do not try to remove the entire white edge in one go.
- Check for Sharp Edges: Gently run your thumb over the trimmed edge. If it’s sharp, use a file to smooth it.
The Toenail Technique:
- Trim Straight Across: This is even more critical for toenails. Always cut them straight across, never curved at the edges. This is the primary method to prevent painful ingrown toenails.
- Leave a Margin: It’s better to leave a tiny bit of white than to cut too close.
- Don’t Dig: Never dig at the corners of the toenails.
If You Nick the Skin (It Happens):
Stay calm. Apply gentle pressure with a clean, dry gauze pad until the bleeding stops (it will be minimal). Do not use a bandage, as it is a choking hazard. The AAP notes that these tiny nicks heal quickly. Keep the area clean.
Chapter 4: Beyond the Trim – Daily Care and Scratch Prevention
Trimming is the main event, but daily maintenance prevents problems.
- The Mittens Debate: Scratch mittens can be useful for the first week or two, especially at night. However, prolonged use can interfere with a baby’s need to explore with their hands, which is crucial for sensory development. Frequent trimming is a better long-term solution than constant mitten use.
- Filing for Maintenance: Keep a fine emery board handy. A few quick strokes can dull a sharp corner instantly without a full trim session.
- Moisturizing: After a bath, gently push back the very thin layer of skin at the base of the nail (the cuticle) with a soft towel. Apply a mild, fragrance-free moisturizer to the hands and feet to keep the skin around the nails soft and prevent hangnails.
Chapter 5: Troubleshooting Common Nail Problems
1. Ingrown Toenails:
This occurs when the corner of the nail grows into the surrounding skin, causing redness, swelling, and pain.
- Prevention: Always cut toenails straight across. Avoid tight socks or footies.
- Home Care (Mild Case): Soak the foot in warm water 2-3 times a day, dry thoroughly, and gently massage the swollen skin away from the nail. Try placing a tiny piece of clean cotton under the ingrown corner to lift it.
- When to Call the Doctor: If the area looks infected (red, warm, oozing pus), or if home care doesn’t improve it within a few days. Do not try to cut out an ingrown nail yourself.
2. Peeling or Brittle Nails:
This is common in newborns as they adjust to the dry outside world. It usually resolves on its own.
- Care: Keep nails trimmed short and smooth. Ensure your baby is well-hydrated. If it persists beyond a few months, mention it to your pediatrician to rule out rare nutritional deficiencies.
3. Discolored Nails:
A white spot is usually a minor past injury to the nail matrix. A greenish-black color under the nail is likely a small blood blister from a pinch or smash (a “subungual hematoma”). It will grow out with the nail. If you see widespread discoloration (yellow, very white) without injury, consult your pediatrician.
4. Skin Infections (Paronychia):
This is an infection of the skin fold around the nail, often from a small cut or hangnail.
- Signs: Red, swollen, warm, and tender skin around the nail, possibly with a pus-filled blister.
- Action: This requires a pediatrician’s evaluation. They may need to drain it and/or prescribe antibiotic ointment or oral antibiotics.
Chapter 6: Building Confidence – A Timeline from Newborn to Toddler
- Newborn (0-4 weeks): File with an emery board or use blunt-tip scissors. Trim weekly or as needed.
- Infant (1-6 months): Graduate to safety clippers or scissors. Trim fingernails 1-2 times per week, toenails every 2-3 weeks.
- Older Baby & Toddler (6 months+): This can become more challenging as they gain mobility. Trim while they are distracted (e.g., watching a short song video), asleep, or immediately after a bath. Sing songs or make it a game to build a positive association.
Conclusion: From Anxiety to Routine
Trimming your baby’s nails is a quintessential parenting task—it seems small but feels huge at first. Remember, you are not alone in your initial trepidation. With the right tools, a calm environment, and a patient technique, it quickly transitions from a nerve-wracking ordeal to a simple, quick part of your caregiving routine.
Prioritize safety by choosing sharp, baby-specific tools and trimming in good light. Prioritize prevention by maintaining a straight-across cut, especially on toenails. And most importantly, be gentle with yourself. A tiny nick is not a failure; it’s a common learning moment. Your confidence will grow with each successful trim, ensuring your baby’s hands and feet remain healthy, safe, and ready to explore the world.
Sources and Further Reading:
- American Academy of Pediatrics. (2023). Caring for Your Baby’s Skin, Hair, and Nails.
- Mayo Clinic. (2022). Infant grooming: How to trim your baby’s nails.
- American College of Obstetricians and Gynecologists (ACOG). (2021). How to Care for Your Baby’s Nails.
- Pediatric Dermatology journals. (Clinical notes on common infant nail conditions).