There’s a moment that every new parent experiences, usually around 2:47 AM, when you’re running on three hours of fragmented sleep and your newborn has just produced a diaper situation that defies the laws of physics. In that groggy, dimly lit haze, your changing station becomes mission control. Every second counts. Every item within arm’s reach matters.
But here’s the thing that the beautifully styled nursery photos on social media don’t tell you: a truly functional changing station isn’t about matching baskets and aesthetic labels. It’s about creating a space that protects your baby’s delicate skin, prevents accidents, and supports your own recovery during the physically demanding postpartum period.
Whether you’re a first-time parent building a registry or an experienced parent looking to optimize your setup, understanding the why behind each supply is just as important as knowing the what. Let’s build the ultimate diaper changing station together, guided by evidence-based recommendations and a focus on what really matters: health and safety.
The Foundation: Choosing Your Changing Station
Before we talk about supplies, we need to talk about where the magic happens. Your changing station’s foundation—the surface itself—is arguably the most important safety decision you’ll make.
The Changing Table vs. The Dresser-Topper Debate
In the world of infant safety, the American Academy of Pediatrics is crystal clear: never leave your baby unattended on a changing table, even for a second (aap.org). With that non-negotiable rule in mind, your choice of surface comes down to stability and ergonomics.
- Standalone Changing Tables: These often come with built-in shelves or drawers. If you choose this route, ensure it’s wide-based and sturdy. Push on it. Does it wobble? If yes, move on.
- The Dresser-Topper Strategy: This is the gold standard for space efficiency and longevity. A low, sturdy dresser with a contoured changing pad secured on top gives you the storage you need while eliminating a piece of furniture you’ll have to get rid of later. The key here is the word “secured.” The pad should have a non-slip bottom or a strap system to keep it from shifting.
Safety Straps Are Not Optional
Many changing pads come with a safety strap. Use it. Always. Even for newborns who “aren’t rolling yet.” Babies have a remarkable ability to choose the exact moment you reach for a diaper to attempt their first acrobatic maneuver. The strap is your backup plan, not your primary supervision method.
Height Matters for Postpartum Bodies
Here’s where maternal health enters the conversation. The American College of Obstetricians and Gynecologists emphasizes the importance of protecting your body during the postpartum recovery period (acog.org). Your changing surface should be at waist height or slightly above. If you’re hunched over, you’re straining your back, core, and pelvic floor muscles that are already working overtime to recover from pregnancy and birth. A surface that’s too low guarantees back pain. A surface that’s too high (like a countertop) creates instability. Aim for that sweet spot where you can stand comfortably upright while working.
The Non-Negotiables: Core Changing Supplies
Now, let’s stock that station. These are the items you simply cannot function without.
1. Diapers: The Foundation of Everything
This seems obvious, but the type of diaper matters. Newborns have incredibly sensitive skin. The World Health Organization notes that maintaining skin integrity is crucial for preventing infection in newborns (who.int).
- Hypoallergenic and Fragrance-Free: Look for diapers labeled hypoallergenic and free from lotions, fragrances, and chlorine processing. Fragrances are a common irritant and can trigger reactions.
- Sizing Matters: A diaper that’s too small will leak and leave red marks. A diaper that’s too large will gap and leak. Check the weight range on the package and size up when your baby consistently exceeds the lower limit.
- Newborn Notch: For the first few weeks, while the umbilical cord stump is still attached, you’ll need diapers with a cut-out or a fold-down front to keep the area dry and exposed to air, as recommended by pediatric guidelines.
2. Wipes: More Than Just Wet Paper
Not all wipes are created equal. Your baby will go through thousands of them, so choosing wisely is a health decision.
- Ingredients List: Look for wipes with short ingredient lists. Water, a mild cleansing agent, and perhaps aloe. Avoid alcohol, fragrances, and harsh preservatives like methylisothiazolinone, which can cause contact dermatitis.
- The Warmth Debate: Warm wipe warmers exist. Some babies are startled by cold wipes; others couldn’t care less. From a health perspective, warm water on a soft cloth is actually the most gentle option. If you use commercial wipes, you can warm them by holding them in your hand for a few seconds before use.
- Disposable vs. Cloth: Cloth wipes (soft flannel squares used with a water spray) are an eco-friendly and hypoallergenic option that many sensitive-skinned babies tolerate well. They require more laundry but eliminate chemical exposure entirely.
3. Diaper Cream: Your First Line of Defense
Diaper rash is not inevitable, but it is common. The key is prevention and knowing what you’re treating.
- Barrier Creams (Zinc Oxide or Petroleum-Based): These are for prevention. They create a physical barrier between your baby’s skin and moisture. Use them at every change, especially overnight when diapers are on longer. Think of it like lip balm for their bottom.
- Antifungal Creams: If a rash appears as bright red, raised bumps (satellite lesions), it may be a yeast infection, often triggered by antibiotics or prolonged wetness. This requires an antifungal medication. According to the Mayo Clinic, you should consult your pediatrician before starting any treatment to ensure you’re using the right product (mayoclinic.org).
- Application Method: Use a spatula or a clean finger. If using your finger, wash your hands thoroughly before and after. Never double-dip a used applicator back into the cream jar, as this can introduce bacteria.

The Hygiene Station: Keeping Things Clean
A diaper change is fundamentally a hygiene event. Protecting your baby from infection means protecting your changing environment.
1. Hand Sanitizer (The Backup Plan)
The CDC recommends washing hands with soap and water whenever possible, but let’s be realistic. When you’re holding a wiggly baby with one hand and a soiled diaper with the other, getting to a sink isn’t always feasible (cdc.gov). Keep a bottle of alcohol-based hand sanitizer (at least 60% alcohol) at your station. Use it before you start and after you finish, especially if you can’t get to a sink immediately.
2. Disposable Changing Pad Liners
These are the unsung heroes of the changing world. These thin, absorbent, often disposable (or washable) pads sit on top of your changing pad cover.
- Why You Need Them: Babies have a remarkable talent for peeing the millisecond cold air hits their skin. A liner catches the mess, protecting your main pad cover. If it gets soiled, you toss it or toss it in the laundry. You don’t have to strip the entire changing pad at 3 AM.
- Travel Versatility: They also double as a clean surface for changing diapers anywhere—at grandma’s house, in a park, or on a public restroom changing table.
3. Diaper Disposal System
Diaper pails have evolved. The key features to look for are odor control and ease of use.
- Hands-Free Operation: A foot pedal is a hygiene game-changer. You don’t want to touch the pail lid with dirty hands.
- Odor Trapping: Systems that twist each diaper into a separate “sausage link” of plastic do a remarkable job of containing smell. This is important for your own mental health; no one wants a nursery that smells like a soiled diaper.
- Simple Trash Can Alternative: Many parents find that a simple, lidded, stainless steel step-can with scented trash bags works just as well and costs significantly less. It’s also easier to empty.
The Organization System: Caddies and Storage
You have the products. Now, how do you keep them organized so you can actually find what you need?
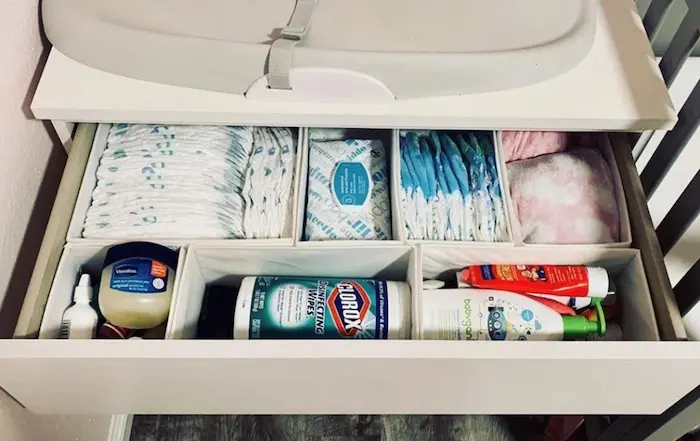
The Stationary Storage: Baskets and Bins
Use open baskets on shelves or in cubbies to group like items.
- Basket One: Diapers, organized by size.
- Basket Two: Creams, ointments, and a small spatula.
- Basket Three: Extra onesies, socks, and mittens for quick changes.
- Basket Four: Receiving blankets or burp cloths (you will always need more of these than you think).
The Portable Caddy: Your Mobile Command Center
This is essential for multi-level homes or if you don’t have a dedicated changing room. A handled caddy allows you to bring the station to the baby, whether you’re in the living room, your bedroom, or the backyard.
- What Goes in the Caddy: A small pack of diapers (5-7), a travel pack of wipes, one full-size tube of barrier cream, a changing pad liner, and one spare onesie.
- Restocking Rhythm: Get in the habit of restocking your caddy every evening so it’s ready for the next day’s adventures.
The Diaper Jellyfish Effect
Avoid the “diaper jellyfish”—that tangled mess that happens when you pull one diaper and ten come flying out. If your diapers come in large, floppy packs, decant them. Stack them neatly in a basket or use a vertical diaper holder that allows you to pull one from the bottom or front.
The Emergency Kit: What to Have on Hand for the Unexpected
Diaper changes are rarely just diaper changes. Be prepared for the curveballs.
1. The Spare Outfit (or Two)
Blowouts happen. They are a rite of passage. Always keep at least one full spare outfit (onesie, pants, socks) within reach of your changing station. When the blowout goes up the back, you don’t want to be digging through a dresser drawer with poop-covered hands.
2. Receiving Blankets or Burp Cloths
These are your all-purpose cleanup crew. Use them as a barrier, use them to mop up unexpected messes, use them as a swaddle if your baby is cold during the change. A stack of prefolds or flour sack towels (the inexpensive cloth diapering option) are incredibly absorbent and versatile.
3. Nail Care Kit
Newborn nails are impossibly tiny, paper-thin, and surprisingly sharp. They will scratch their face, and you will feel terrible.
- Baby Nail Clippers or Scissors: Look for clippers with a built-in magnifying glass or safety bulbs that make it harder to cut the skin.
- Electric Nail File: Many parents find these less intimidating. They gently file down the nails without the risk of nicking the quick.
- When to Trim: The best time to trim a baby’s nails is when they are sleeping deeply. Trying to do it with a wide-awake, wiggly newborn is an exercise in futility.
4. Digital Thermometer
Fevers in newborns are handled differently than in older children. The AAP recommends that any fever in an infant under 2 months should be evaluated by a doctor immediately (aap.org). Having a reliable digital rectal thermometer (the most accurate method for infants) at your changing station means you can check at the first sign of fussiness or warmth.
5. Gas Relief Drops
Many newborns struggle with gas as their digestive systems mature. Having simethicone drops on hand at the changing station (well out of baby’s reach, of course) means you can address discomfort quickly during or after a change.
For Boys vs. Girls: Anatomical Considerations
While the core supplies are the same, a few anatomical notes can make your life easier and keep your baby healthier.
For Baby Boys
- The Cold Air Pee: This is not a myth. The moment cool air hits the skin, baby boys often pee. The solution? The “Pee-Pee Teepee” (a small fabric tent) or simply laying a wipe or washcloth over the penis as soon as you open the diaper. Wait a few seconds before proceeding with the full clean-up.
- Circumcision Care: If you’ve chosen to have your son circumcised, your pediatrician will provide specific aftercare instructions. This typically involves gently applying petroleum jelly to the area to prevent the diaper from sticking to the healing skin. Keep a separate tube of plain petroleum jelly in your station for this purpose during the first week.
For Baby Girls
- Wiping Direction: This is crucial for preventing urinary tract infections. The Mayo Clinic and all major pediatric authorities stress that you should always wipe from front to back (mayoclinic.org). This prevents bacteria from the rectum from being introduced into the urethra or vagina. Make this a habit from day one.
- Vaginal Discharge: It is completely normal for newborn girls to have some white or even slightly bloody vaginal discharge in the first few weeks. This is from maternal hormones and requires no treatment—just gentle cleansing with water during changes.

The “Skip It” List: What You Don’t Need
Just as important as knowing what to buy is knowing what to leave at the store. Your changing station should be a sanctuary of necessity, not a landing pad for marketing gimmicks.
1. Dedicated Wipe Warmers
These seem luxurious, but they are often a solution in search of a problem. They can dry out wipes, and they create one more thing to plug in and clean. Worse, they can be a breeding ground for bacteria if not cleaned meticulously. A room-temperature wipe is fine. Your baby will adjust.
2. Fancy Diaper Stackers
A simple basket or open shelf works better. Diaper stackers (the hanging fabric kind) often make it difficult to see how many diapers you have left and can be awkward to pull from one-handed.
3. Non-Safety Strap Changing Pads
If a changing pad doesn’t have a safety strap or a non-slip bottom, skip it. Your baby’s safety is not worth the aesthetic of a particular pad cover.
4. Excessive Lotions and Potions
Newborn skin does not need a 10-step skincare routine. In fact, the National Institute of Child Health and Human Development advises that less is often more when it comes to newborn skin to avoid irritation (nichd.nih.gov). Stick to a simple barrier cream and maybe a gentle, fragrance-free lotion if your pediatrician recommends it for dry skin. That’s it.
Setting Up for Postpartum Success
Let’s circle back to you for a moment. The postpartum period is physically demanding. Your changing station can either support your healing or work against it.
- Stay Hydrated: Keep a water bottle within arm’s reach of your changing station. You’ll be there a lot. Dehydration affects milk supply and energy levels.
- Night Lighting: Install a dimmable light or a small, red-hued nightlight near your station. Bright lights at 3 AM signal to your brain that it’s time to be awake, making it harder to fall back asleep. Red light has the least impact on your natural melatonin production.
- Keep Snacks Nearby: If your changing station is in your room (where you’ll likely spend a lot of time with a newborn), stash a small basket of shelf-stable snacks like granola bars or nuts. Hunger hits hard and fast when you’re caring for a newborn.
Conclusion: Your Station, Your Sanctuary
Building a diaper changing station is one of the first practical tasks of parenthood. It’s easy to get swept up in the cute accessories and the aesthetically pleasing baskets. But at its heart, this small corner of your home serves a profound purpose: it’s where you will care for your baby’s most basic needs, protect their delicate health, and bond with them thousands of times over the coming months and years.
By focusing on the essentials—the safe surface, the gentle products, the hygienic practices, and the smart organization—you create more than just a functional space. You create a sanctuary of care. A place where, even in the bleary-eyed moments of the night, you have exactly what you need to keep your baby comfortable, healthy, and safe.
And in those early days of parenthood, that certainty is worth more than any perfectly coordinated diaper stacker ever could be.